
Hey, so you’re thinking about redoing your kitchen backsplash?
That’s awesome, it can really change the vibe of your kitchen.
But let me tell you, before you even think about picking out tiles or grabbing a trowel, it’s super important to get your measurements right.
I can’t stress this enough—accurate measurements are the backbone of any successful backsplash kitchen remodel project.
In this article “how to measure for kitchen backsplash”, I will cover everything you need to know for getting the backsplash measurement right.
It includes things you will need and step by step guide on measuring and calculating backsplash quantity.
Let’s get started….
This post is about how to measure for kitchen backsplash
JUMP TO:
How to calculate the square footage
Calculating Extra Tiles & Waste Allowance
Measurement Tips for Different Layouts
Tile Types and Their Impact on Measurements
What to consider when choosing backsplash tiles
Best material for kitchen backsplash tile
Cost to install backsplash tile
Before you enter into the world of kitchen renovation, it’s crucial to get the basics right.
Think of measuring for a kitchen backsplash as laying the foundation for a house.
Get it wrong, and everything that comes afterward could be flawed.
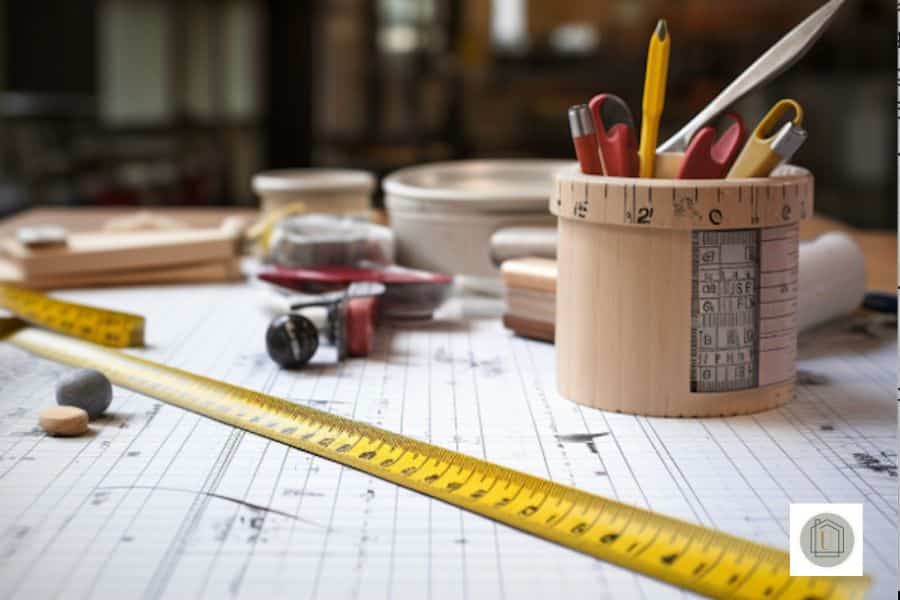
Tools you will need
Here are the necessary tools you will need:
Tape Measure
Measuring Tape
Piece of Paper
Calculator
Pencil
Understanding your space
First step is that you need to clear the area.
Remove any appliances, utensils, or décor that might be sitting on the countertop against the wall where your new backsplash is going.
You want a clear, unobstructed view so you can get the most accurate measurements possible.
Trust me, it makes a world of difference.
Before you measure, draw a rough sketch of the coverage area where the backsplash will go.
This gives you a blueprint to refer back to.
So what does a typical backsplash area look like?
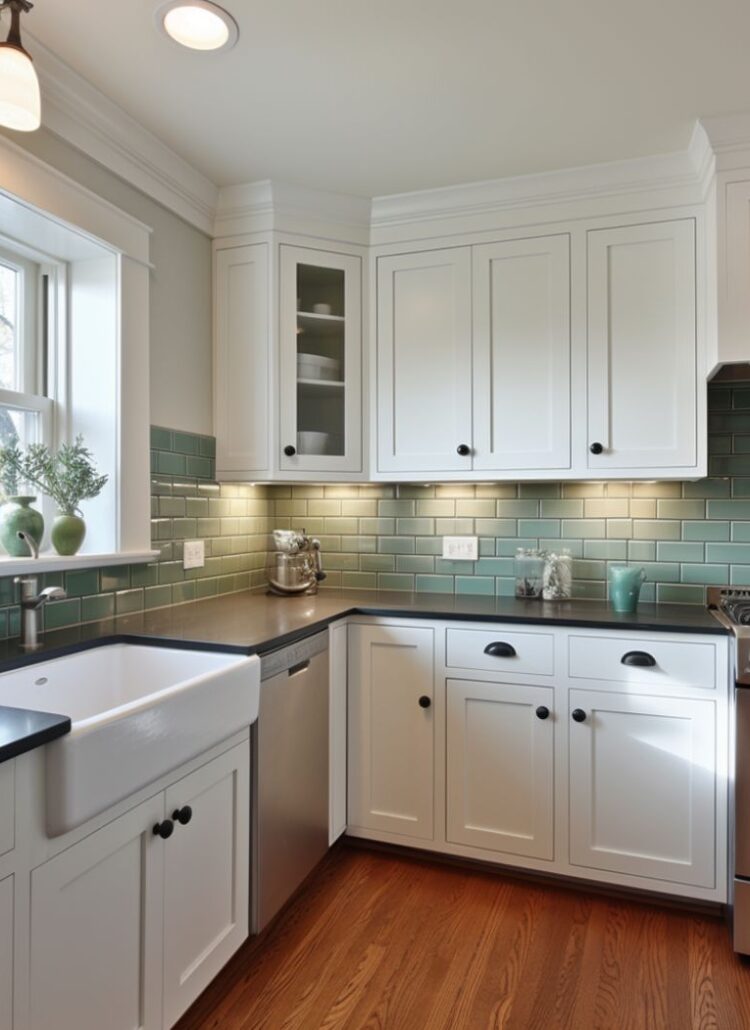
Generally speaking, a kitchen backsplash is the wall space between the bottom of your upper cabinets and the top of your countertop.
The average height ranges from about 15 to 20 inches, but that can vary depending on your specific kitchen design and personal preferences.
Some people opt for a full-wall backsplash that goes all the way up to the ceiling for a more dramatic look.
It’s really up to you and what you think will work best in your space.
Now, why are backsplash tiles so crucial?
- Protects walls from spills and splashes for easier cleanup.
- Can transform the overall aesthetic of the kitchen.
- Serves as a focal point or unifying element in the design.
- Adds texture and color to the kitchen space.
- Elevates the overall design with a potential ‘wow factor.’
- Choice of material (ceramic, glass, natural stone, etc.) adds additional texture and complexity.
Step by Step guide to measure

Here are the simple steps:
Measure the Length
Start by measuring the length of your countertop where your backsplash will go.
Place the tape measure at one end and extend it to the other.
Write this number down as it’s the basis for how wide your material needs to be.
Measure the Height
The height of your backsplash typically goes from the countertop to the bottom of the upper cabinets.
Measure this vertical distance accurately, making sure you measure at various points to account for any irregularities in your wall.
Measuring areas that are not Straight:
if you’re dealing with areas that aren’t just straight lines and simple shapes, here’s what you do.
Break those weird corners or curves into shapes you know how to measure, like squares or triangles.
Measure each of these smaller sections of simple shapes, and then add all those numbers up.
Makes it a whole lot easier, doesn’t it?
Specific Areas:
Sometimes your backsplash area will have cutouts for electrical outlets, windows, or other fixtures.
Measure these specific areas carefully and subtract them from your total square inches.
This will make sure you won’t overestimate the number of tiles you need.
How to calculate the square footage

The Formula:
Length” x Width of the area ” = Total square area in inches
Total square area in inches / 144 = X total square feet
Let’s assume these are the measurements for all the sections from the image above:
Section A
Length : 20 inches , Height : 15 inches
20 x 15 = 300 inches
300 / 144 = 2.08 Square Feet
Section B
Length : 12 inches, Width : 18 inches
12 x 18 = 216 square inches
216 / 144 = 1.5 Square feet
Section C
Length : 20 inches , Height : 15 inches
20 x 15 = 300 square inches
300 / 144 = 2.08 Square Feet
Section D
Length : 24 inches , Height : 15 inches
24 x 15 = 360 square inches
360 / 144 = 2.5 square feet
Final Number = Section A + B + C + D
2.08 + 1.5 + 2.08 + 2.5 = 8.16 Square feet
You will need 8.16 square feet of tile
Why Do You Divide By 144?
There are 144 square inches in a square foot because a foot has 12 inches, and 12 inches x 12 inches equals 144 square inches.
So, if you have measured an area in square inches and you want to know how many square feet that area is, you would divide the total number of square inches by 144.
For example, if you have a backsplash area that is 1,440 square inches, you would divide 1,440 by 144 to find that it is 10 square feet.
This conversion is often necessary because flooring and backsplash materials are often sold by the square foot, not by the square inch.
Here is a really good Video from Fireclay
Common Mistakes
Not Accounting for Obstacles:
Got an electrical outlet or a weird corner?
Make sure you measure around it.
It’s not just about the big, empty spaces, those little details matter too.
Forgetting the Grout Line area:
Tiles need to be spaced apart, and that’s what grout lines are for.
If you forget to factor these in, you’re gonna be in a pickle.
Forgetting to Measure for Trim Pieces: These are the finishing touches that make your project look polished.
Don’t forget to measure and plan for them too to figure out the right amount of tile
Calculating Extra Tiles & Waste Allowance
Alright, let’s talk about something really important: extra kitchen backsplash tiles and waste allowance.
You might be thinking, “Hey, I’ve measured everything perfectly.
Why would I need extra tiles?” Trust me, you do, and here’s why.
Firstly, mistakes happen.
Even if you’re super careful, there’s always the chance you’ll mess up a cut or break a tile.
Having a few extras can save you a trip back to the store.
Secondly, tiles can be from different lots, which means slight variations in color or size.
If you have to go back to the store weeks or months later, you might not find an exact match.
And don’t forget, tiles can get damaged over time.
Having a few extras stashed away means you can easily replace them without having to scramble to find a match.
Now, how do you figure out how many extra tiles you need so that you have enough tiles?
That’s where waste allowance comes in.
Waste allowance is basically a safety net.
It’s a percentage you add to your total square footage to account for cuts, breaks, and other unforeseen tile tragedies.
Here’s how to do it:
Calculate the Total Area: Measure your backsplash area and get the total square footage (or square inches, if you prefer).
Add a Percentage for Waste: A good rule of thumb is to add 10-15% to your total area for waste.
So if your backsplash is 25 square feet, you’d get 2.5 to 3.75 extra square feet of tiles.
Here’s the math part:
Total Tiles Needed = TotalArea+(TotalArea×WastePercentage)
So if your area is 25 square feet and you’re adding a 10% waste allowance,
you’d do:
25+(25×0.10)=27.525+(25×0.10)=27.5
So, you’d need 27.5 square feet of tiles to be on the safe side.
By calculating waste allowance, you’re giving yourself that buffer zone to avoid any last-minute runs to the store.
Making sure that your project won’t come to a screeching halt just because of a few broken or miscut tiles.
Makes sense, right?
Measurement Tips for Different Layouts
L-shaped Kitchens
In an L-shaped kitchen, you’ll have two walls meeting at a corner.
Measure both walls individually, as you would for a straight wall, then add the square footages together.
Galley Kitchens
Galley kitchens typically have backsplashes on parallel walls.
Make sure to measure both sides separately, then add up the areas to know how much material you’ll need.
U-shaped Kitchens
Here, you’ll have three walls to measure. Again, treat each one as its own project and add the square footages at the end for a total estimate.
Tile Types and Their Impact on Measurements
Alright, now let’s get into the nitty-gritty: the type of tiles you’re going to use for your backsplash material.
Believe it or not, the type of material you choose can have a big impact on how you measure and even how much tile you need.
Let’s break it down.
Ceramic Tiles
Ceramic tiles are super popular, and for good reason.
They’re durable and come in all sorts of colors and styles.
Because they’re so commonly used, you’ll find a lot of standard sizes, making it easier to calculate how many you’ll need.
Glass Tiles
Glass tiles give a modern and sometimes almost translucent look.
They often come in smaller sizes, meaning you might need more individual tiles to cover the same area, which should be factored into your measurements.
Natural Stone Tiles
Natural stone tiles like marble or granite can vary a lot in size and thickness.
Because they’re heavier, you might have to also consider the strength of your kitchen walls and adhesive when planning your project.
Porcelain Tiles
These are basically a type of ceramic tile but are less porous and often more durable.
If you’re thinking of going high-end, porcelain tiles are a great option.
Again, the size can vary, affecting your total count.
Tile Size
Okay, let’s talk about tile size of kitchen tile backsplash for a sec.
The size of the tiles can greatly affect how many you need.
Larger tiles will cover more area faster, meaning you’ll need fewer of them.
Smaller tiles mean the opposite: you’ll need more individual tiles to cover the same area.
Larger Tiles vs. Individual Tiles
Larger tiles are easier to lay down and need fewer grout lines, making your job quicker.
But individual, smaller tiles give you more flexibility for complex patterns or tricky spaces, like corners or curves.
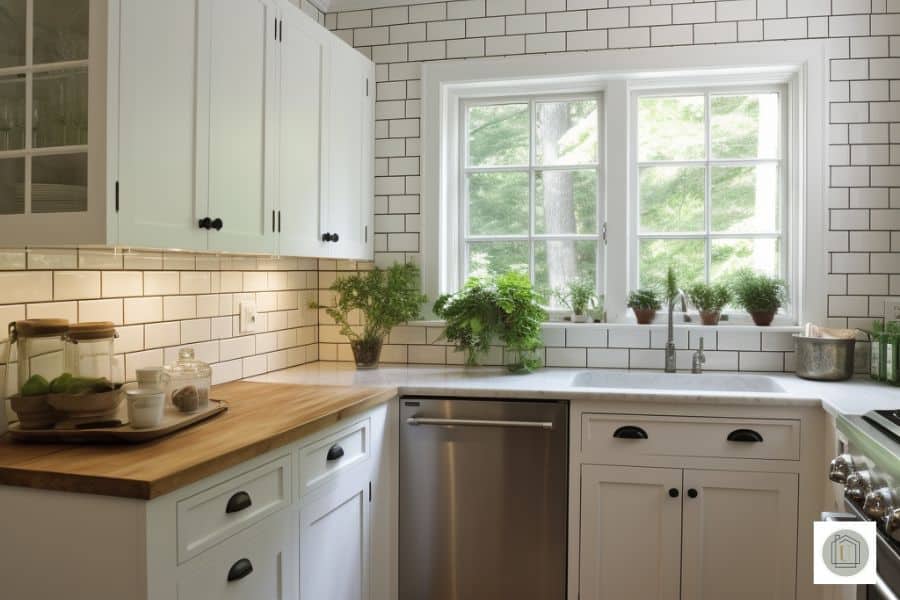
Subway Tile
These are classic and super popular, especially for kitchen backsplashes.
They’re usually rectangular and fairly easy to measure and install.
Just remember that their larger size means fewer tiles but more attention to alignment.
So, as you can see, the type of tile you choose doesn’t just affect how your backsplash will look.
It also impacts your measurements and the amount of material you’ll need.
Factor these in when you’re doing your planning, and you’ll save yourself a bunch of headaches down the line.
Got it? Cool, let’s move on!
Design and Aesthetic Choices
So you’ve got your basic measurements and you’ve picked your tile type.
But hang on a second, what about the design?
The layout or pattern you choose can actually change the amount and types of tiles you’ll need.
Let’s dive into that a bit.
Personal Preference
First and foremost, your new kitchen backsplash should reflect your own personal style.
Whether you want something that makes a statement or something more subdued, your personal preference will affect the tile type, color, and even the pattern you choose.
Color Schemes
When it comes to color schemes, it’s not just about what you like.
You’ve got to consider how it fits with the entire space of your kitchen — think cabinets, countertops, kitchen floor even appliances. Color can be a focal point or a complementary element in the overall look of the space.
Focal Point vs. Overall Look
Some folks use their backsplash as a focal point, a place to add a pop of color or a complex design.
Others want it to blend in with the overall look of the kitchen.
Knowing what role you want your backsplash to play will help determine how many and what types of tiles you’ll need.
Design of the Tiles
The actual design on the tiles themselves can also impact your layout and, consequently, your measurements.
Some designs might look better in a specific pattern or with specific spacing, which could mean you need more or fewer tiles.
Square Shapes vs. Other Shapes

Tiles come in all sorts of shapes, not just squares.
And your layout could be anything from simple rows to complex patterns like herringbone.
Each of these will require a different number of tiles.
So don’t forget to factor that in when calculating your needs.
Popular Choice
What’s trendy might be a factor you want to consider.
Subway tiles are a popular choice for a reason—they’re timeless and relatively easy to work with.
But going with what’s popular might also mean you’ll end up with a look that a lot of other people have.
So weigh the pros and cons.
Special Considerations
Trim Pieces & Decorative Liner
So, what are trim pieces?
These are those little extras that add a finishing touch to your backsplash.
They could be edges, corners, or even special decorative pieces that add flair to the design.
It is always a good idea to measure for these just like you do for the tiles, and yes, they count toward your total square footage—or square inches, or however you’re measuring.
Decorative liners, on the other hand, are like the jewelry of your backsplash—those special strips of tile that can add a splash of color or texture.
These will need to be measured separately from your main tiles, and you’ll need to decide in advance where you want them to go.
So, remember to factor them into your total material count.
Calculating Grout Line Spaces
Grout lines play a significant role in your backsplash’s final appearance.
Depending on the material, leaving space for grout lines is essential.
Typically, a 1/8″ to 1/16″ grout line is standard for most tiles.
Add the width of your chosen grout line to the size of your tile.
Multiply this by the number of tiles you’ll have in a row and compare it to your initial measurements.
Adjust accordingly.
What to consider when choosing backsplash tiles

- Material: Ceramic, glass, natural stone, and porcelain are common choices. Each has its own pros and cons.
- Color & Style: Choose a color that matches or complements your kitchen’s overall theme.
- Texture and Finish: Glossy or matte? Smooth or textured? These choices affect the look and feel.
- Tile Size: Larger tiles install faster but may look less intricate. Consider classic options like subway tile as well.
- Pattern and Layout: Grids are simple, but patterns like herringbone can add flair. Complex patterns may need more tiles.
- Personal Preferences: Do you want a focal point or a subtle look? Your choice can include decorative tiles or unique shapes.
- Budget: Know your budget before falling in love with high-end options.
Best material for kitchen backsplash tile
Selecting the best material for a kitchen backsplash depends on various factors such as aesthetic preference, functionality, and budget. Here are some popular options:
Ceramic Tiles
- Pros: Affordable, easy to clean, and comes in various colors and designs.
- Cons: Less durable than some other materials, may chip or crack.
Glass Tiles
- Pros: Reflects light, easy to clean, and offers a modern look.
- Cons: More expensive and may show water spots or fingerprints.
Natural Stone (e.g., Granite, Marble, Travertine)
- Pros: Durable, adds a luxurious feel, unique natural patterns.
- Cons: Porous, needs to be sealed, more expensive.
Porcelain Tiles

- Pros: Very durable, water-resistant, and versatile in terms of design.
- Cons: Can be pricey, harder to install due to weight.
Stainless Steel
- Pros: Sleek, modern aesthetic, easy to clean, and very durable.
- Cons: Shows scratches and may dent, more industrial look may not suit all kitchens.
Subway Tiles
- Pros: Classic look, easy to install and clean, generally inexpensive.
- Cons: Can be perceived as too common or basic for some tastes.
Mosaic Tiles
- Pros: Allows for intricate designs and color schemes, can serve as a focal point.
- Cons: More difficult to install, can be expensive depending on the material.
Cost to install backsplash tile
The cost to install a backsplash tile in a kitchen can vary widely depending on various factors such as the type of tile, labor rates, the complexity of the design, and your geographical location.
Here’s a breakdown to give you a general idea:
Factors That Affect Cost
Material cost depending on the type of Tile
- Ceramic: Generally the most affordable, ranging from $5 to $15 per square foot.
- Glass: Usually costs between $20 to $30 per square foot.
- Natural Stone: Can go upwards of $25 to $50 per square foot.
- Porcelain: Ranges between $10 to $20 per square foot.
- Specialty Tiles (e.g., mosaic, metal): These can be particularly expensive, starting at $30 per square foot and up.
Labor Costs
- Labor can vary by region, but typically it’s between $10 to $40 per square foot.
Complexity of Design
- Simple designs will be at the lower end of the labor cost spectrum, while intricate patterns may cost more to install.
Additional Materials
- You’ll also need to account for things like grout, adhesive, and any specialized trim pieces. These can add another $1 to $5 per square foot.
Geographic Location
- Costs can be higher in big cities or high-cost-of-living areas.
Examples:
Low-End Scenario
- Tile Cost: 30 sq ft x $5/sq ft = $150
- Labor Cost: 30 sq ft x $10/sq ft = $300
- Additional Materials: 30 sq ft x $1 = $30
- Total: $480
High-End Scenario
- Tile Cost: 30 sq ft x $50/sq ft = $1,500
- Labor Cost: 30 sq ft x $40/sq ft = $1,200
- Additional Materials: 30 sq ft x $5 = $150
- Total: $2,850
Always get multiple quotes and read reviews before hiring a contractor.
Also, ask for an itemized estimate to understand where your money is going.
Keep in mind that these are just estimates and actual costs can vary.
FAQs

How do I calculate how much backsplash I need?
To calculate how much backsplash you need, you’ll need to:
- Measure the length and height of the area where the backsplash will go.
- Multiply the length by height times to get the total square inches or square feet of the area.
- Add extra for waste and mistakes, generally about 10-15%.
- Divide by the area one tile covers to get the number of tiles needed.
What size should kitchen backsplash be?
The size of a kitchen backsplash is typically between 15 to 18 inches between the countertop and the bottom of the upper cabinets.
However, the size can vary based on design preferences and specific needs.
How much does it cost to install a 50 sq ft backsplash?
The cost to install a 50 sq ft backsplash can vary widely depending on several factors such as the type of tile, the complexity of the design, and labor rates in your area.
On average, tile installation can range from $10 to $60 per square foot.
For a 50 sq ft area, this means you could be looking at a cost ranging from $500 to $3,000 just for installation.
How much is backsplash labor per sq ft?
The labor cost for installing a kitchen backsplash can vary.
Labor costs for a basic tile backsplash could range from approximately $10 to $40 per square foot
How much space should you leave between a backsplash on a countertop?
Generally, there is no space left between the backsplash and the countertop.
The backsplash is installed directly above the countertop to create a seamless look and prevent water or debris from falling in between the two.
The purpose of the backsplash is to protect the wall from spills and splatters, and leaving a gap would defeat that purpose.
However, there may be a small gap (about 1/8-inch) left for caulking.
This can depend on your specific installation and the recommendations of your contractor.
Always consult with a professional for the most accurate advice tailored to your project.
Should backsplash be even with cabinet or countertop?
The placement of your backsplash can be either aligned with the edge of your countertop or with the edge of your cabinets, depending on your design preference and functional needs.
If you align it with the countertop, it creates a cohesive, streamlined look that draws the eye horizontally. This often gives the appearance of more counter space and is generally easier to install.
Aligning the backsplash with the edge of the upper cabinets will draw the eye upwards, making the space look taller. It also provides a “frame” around the area, which can be visually appealing.
Should kitchen backsplash go all the way up?
Whether or not your kitchen backsplash should go all the way up to the upper cabinets, the ceiling, the entire wall or somewhere in between depends on various factors including design style, functionality, and budget.
Aesthetics:
Extending the backsplash all the way up can create a dramatic, eye-catching effect. This is particularly true if you’re using an intricate pattern or a luxurious material like marble.
Functionality:
A higher backsplash can provide more protection against splashes for the wall area.
Budget:
Extending the backsplash will require more material and, therefore, will be more costly.
Space and Layout:
If there’s a significant distance between your countertops and upper cabinets, or if you have features like a range hood or open shelving, extending the backsplash may make more sense.
Resale Value: While a full backsplash can be a selling point, it’s also a matter of current trends, which can change.
Can kitchen backsplash be done in one day?
Yes, mostly kitchen backsplash can be done in a day.
If you liked this article please share on Facebook. It would mean the world to me.
Xo,
Simi
40 Stunning Kitchen Accent Wall Ideas for Any Design Style


Leave a Reply